This is the easiest way to to customise and displays logo, navigation menu. However it’s limited in terms of customisation and layout availabilities because it’s using theme’s predesigned header layouts

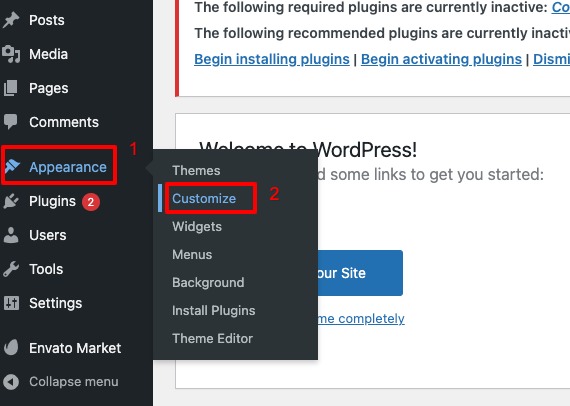
You can customise all header options from Appearance > Customize.

Upload Logo
By default theme displays its standard logo in header. You can replace it with your logo image. Go to Appearance > Customize > Site Logo Click “Select Image” button and select logo image from your computer or media library.
Transparent Logo
Some pages use transparent logo instead of general logo for page with menu transparent option enabled. It’s easier for you to upload transparent logo just for these background image focused pages.
IMPORTANT: recommended transparent logo image in white color.
Top Bar

Top bar allow to display extended content ex. top menu, social icons etc. above main menu area, To enable it open Appearance > Customize > Navigation > Top Bar
Creating New Menu
Theme support default WordPress custom menu option which you can organise each menu items using drag&drop in Appearance > Menus.

To use theme predefined menu layouts. First please navigate to Appearance > Customize > Navigation > General > Display Header Content From and select “General Menu Layout”
Menu Locations

- Primary menu – This is the main menu that shows in header area.
- Secondary menu – This is the 2nd main menu that shows in header area for header layouts which displays 2 menus.
- Top Bar Menu – This is the menu that will be used in top bar area.
- Side (Mobile) Menu – This is the menu that will be used for mobile devices.
- Footer Menu – This is the menu that shows in footer copyright area.
Menu Layouts Option

Theme Support various menu layouts and you can change it via Appearance > Customize > Navigation > General > Menu Layout.
Setup Primary Menu
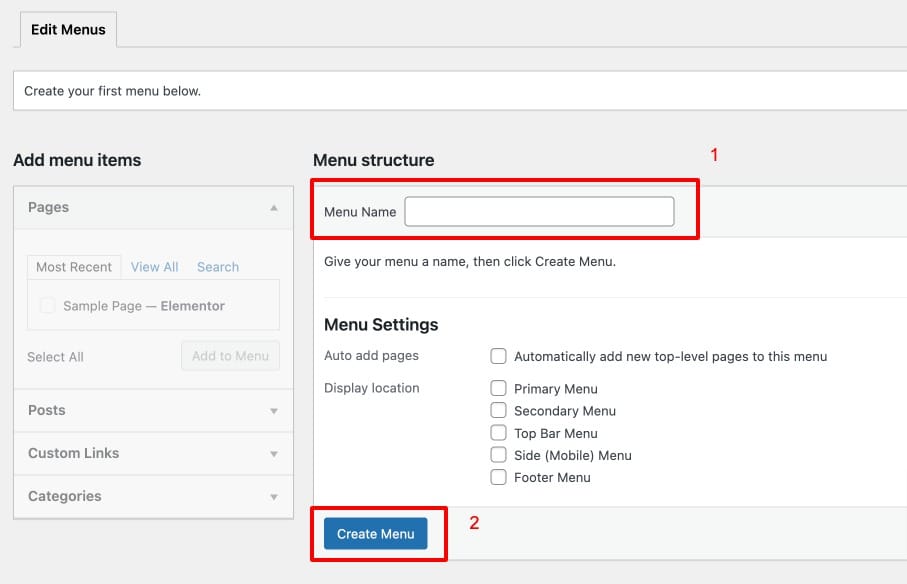
- Go to Appearance > Menus. Click “Create Menu” button
- To add menu items, select one of your pages/posts on the left hand boxes. Then click “Add To Menu”.
- If you want to add custom link menu item (for example home link). Select “Links” and enter URL, Link Text there.
- You can organise your menu items using drag&drop functionality. Simple drag a menu item right below to the parent menu item.
- After setting up your menu, scroll down to the bottom of the page then assign the menu to “Primary Menu” in the Theme Locations box.
Sticky Menu (Optional)

If you enable sticky menu option. When visitor scroll down to page. The menu bar will stay at top while visitor scrolling. You can enable this option via Appearance > Customize > Navigation > General > Enable Sticky Menu
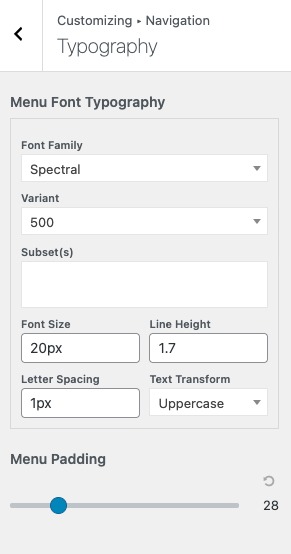
Main Menu Typography & Colors
Manage your main menu typography and colors with ease. You can customise font family, font size, colors etc. through theme customizer via Appearance > Customize > Menu

Main Menu Typography (Appearance > Customize > Navigation > Typography)

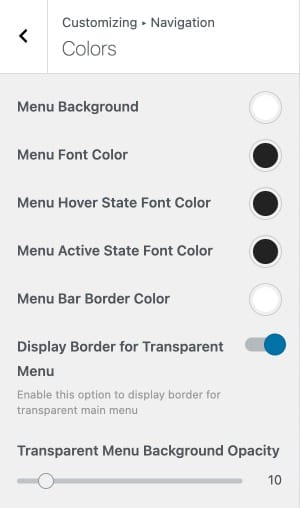
Main Menu Colors (Appearance > Customize > Navigation > Colors)
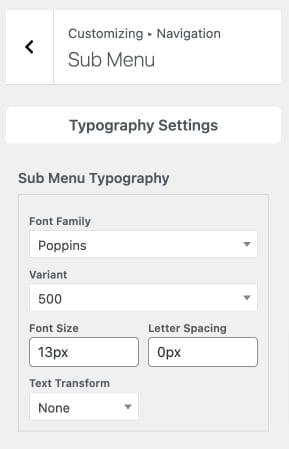
Main Sub Menu Colors (Appearance > Customize > Navigation > Sub Menu)


 Icon Settings (Optional)


 Icon Settings (Optional)

