Go to WordPress Dashboard > Galleries > Add New Gallery
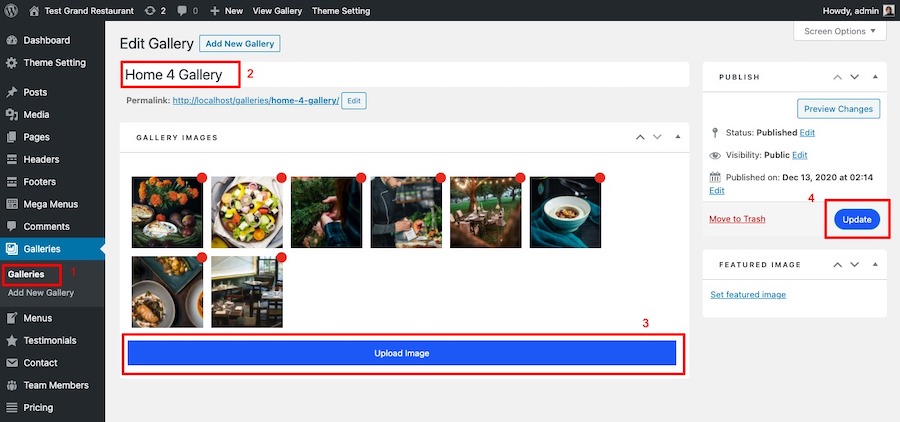
Enter gallery title and you can add images to this gallery. From gallery admin page. Click on “Upload Image”.
Then select images you want to upload to this gallery. Once you finish upload each image. It will automatically attach to this gallery. You can also change image caption and description by clicking image from this page. If you want to change order of images within gallery. You can easily drag&drop image next to each one. Once you finish dragging, click “Update” to save changes.
Create a gallery page using Elementor
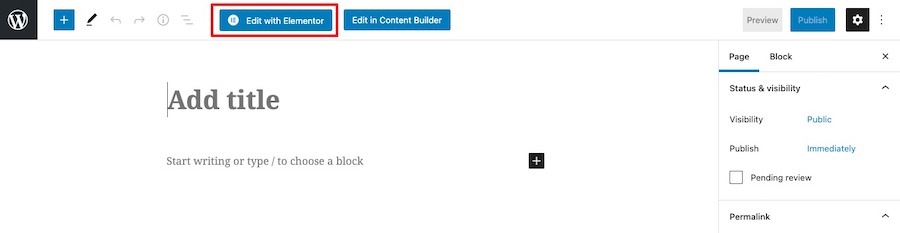
Go to WordPress Dashboard > Pages > Add New and enter page title.
Click “Edit with Elementor” button to open Elementor Page Builder.
You will open a Elementor page builder. On the left sidebar.
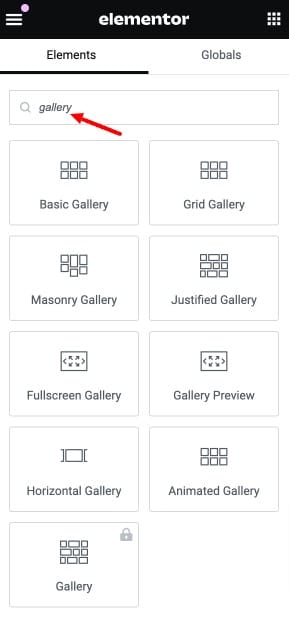
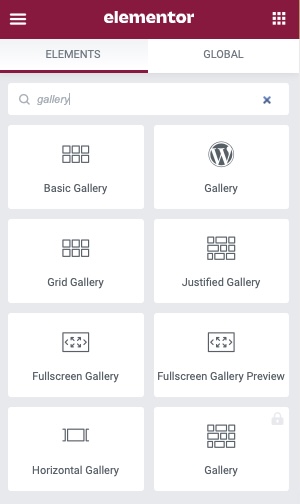
To add gallery widget. Click on search bar on the left sidebar widget box. Then type “Gallery” it will shows all gallery widgets. You can drag widget you want to add to the main content area on right side.
Go to WordPress Dashboard > Galleries > Add New Gallery
Enter gallery title and you can add images to this gallery. From gallery admin page. Click on “Upload Image”.
Then select images you want to upload to this gallery. Once you finish upload each image. It will automatically attach to this gallery. You can also change image caption and description by clicking image from this page. If you want to change order of images within gallery. You can easily drag&drop image next to each one. Once you finish dragging, click “Update” to save changes.
See Customer Proofing Activity Logs.
When you edit the gallery post. On the right sidebar. You will find “Gallery Proofing Log” box which you can see the proofing activity logs for this gallery.
Create proofing gallery page using Elementor
From gallery editing page. Please find “Edit with Elementor” button under gallery title. Click the button.
You will open a Elementor page builder. On the left sidebar. On the left sidebar search option. Search for “Proofing Gallery” widget and drag it to the right content area.
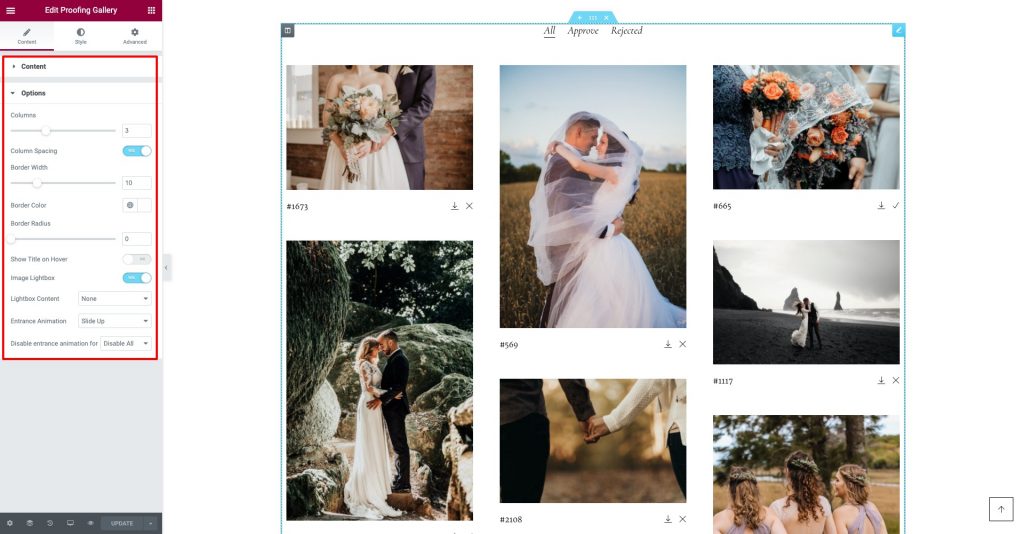
It will automatically displays the proofing gallery widget content with images within gallery. You can customise widget’s options on the left sidebar.
Go to WordPress Dashboard > Galleries > Add New Gallery
Enter gallery title and you can add images to this gallery. From gallery admin page. Click on “Upload Image”.
Then select images you want to upload to this gallery. Once you finish upload each image. It will automatically attach to this gallery. You can also change image caption and description by clicking image from this page. If you want to change order of images within gallery. You can easily drag&drop image next to each one. Once you finish dragging, click “Update” to save changes.
Customise gallery page using Elementor
From gallery editing page. Please find “Edit with Elementor” button under gallery title. Click the button.
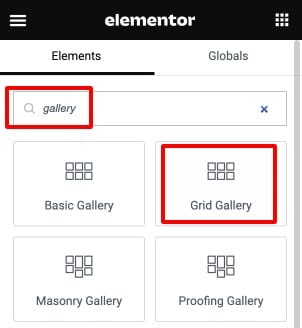
You will open a Elementor page builder. On the left sidebar. On the left sidebar search option. Search for “Gallery” widget and drag one of theme gallery widget “Grid Gallery” to the right content area.
It will automatically displays the gallery widget content with images within gallery.
Add gallery widget to a page using Elementor
Go to WordPress Dashboard > Pages > Add New and enter page title.
Click “Edit with Elementor” button to open Elementor Page Builder.
You will open a Elementor page builder. On the left sidebar.
To add gallery widget. Click on search bar on the left sidebar widget box. Then type “Gallery” it will shows all gallery widgets. You can drag widget you want to add to the main content area on right side.
Go to WordPress Dashboard > Galleries > Add New Gallery
Enter gallery title and you can add images to this gallery. From gallery admin page. Click on “Upload Image”.
Then select images you want to upload to this gallery. Once you finish upload each image. It will automatically attach to this gallery. You can also change image caption and description by clicking image from this page. If you want to change order of images within gallery. You can easily drag&drop image next to each one. Once you finish dragging, click “Update” to save changes.
Customise gallery page using Elementor
From gallery editing page. Please find “Edit with Elementor” button under gallery title. Click the button.
You will open a Elementor page builder. On the left sidebar. On the left sidebar search option. Search for “Gallery” widget and drag one of theme gallery widget “Grid Gallery” to the right content area.
It will automatically displays the gallery widget content with images within gallery.
Add gallery widget to a page using Elementor
Go to WordPress Dashboard > Pages > Add New and enter page title.
Click “Edit with Elementor” button to open Elementor Page Builder.
You will open a Elementor page builder. On the left sidebar.
To add gallery widget. Click on search bar on the left sidebar widget box. Then type “Gallery” it will shows all gallery widgets. You can drag widget you want to add to the main content area on right side.
Go to WordPress Dashboard > Galleries > Add New Gallery
Enter gallery title and you can add images to this gallery. From gallery admin page. Click on “Upload Image”.
Then select images you want to upload to this gallery. Once you finish upload each image. It will automatically attach to this gallery. You can also change image caption and description by clicking image from this page. If you want to change order of images within gallery. You can easily drag&drop image next to each one. Once you finish dragging, click “Update” to save changes.
Create proofing gallery page using Elementor
From gallery editing page. Please find “Edit with Elementor” button under gallery title. Click the button.
You will open a Elementor page builder. On the left sidebar. On the left sidebar search option. Search for “Proofing Gallery” widget and drag it to the right content area.
It will automatically displays the proofing gallery widget content with images within gallery. You can customise widget’s options on the left sidebar.
Go to WordPress Dashboard > Galleries > Add New Gallery
Enter gallery title and you can add images to this gallery. From gallery admin page. Click on “Upload Image”.
Then select images you want to upload to this gallery. Once you finish upload each image. It will automatically attach to this gallery. You can also change image caption and description by clicking image from this page. If you want to change order of images within gallery. You can easily drag&drop image next to each one. Once you finish dragging, click “Update” to save changes.
Customise gallery page using Elementor
From gallery editing page. Please find “Edit with Elementor” button under gallery title. Click the button.
You will open a Elementor page builder. On the left sidebar. On the left sidebar search option. Search for “Gallery” widget and drag one of theme gallery widget “Grid Gallery” to the right content area.
It will automatically displays the gallery widget content with images within gallery.
Add gallery widget to a page using Elementor
Go to WordPress Dashboard > Pages > Add New and enter page title.
Click “Edit with Elementor” button to open Elementor Page Builder.
You will open a Elementor page builder. On the left sidebar.
To add gallery widget. Click on search bar on the left sidebar widget box. Then type “Gallery” it will shows all gallery widgets. You can drag widget you want to add to the main content area on right side.
Go to WordPress Dashboard > Galleries > Add New Gallery
Enter gallery title and you can add images to this gallery. From gallery admin page. Click on “Upload Image”.
Then select images you want to upload to this gallery. Once you finish upload each image. It will automatically attach to this gallery. You can also change image caption and description by clicking image from this page. If you want to change order of images within gallery. You can easily drag&drop image next to each one. Once you finish dragging, click “Update” to save changes.
Create a gallery page using Elementor
Go to WordPress Dashboard > Pages > Add New and enter page title.
Click “Edit with Elementor” button to open Elementor Page Builder.
You will open a Elementor page builder. On the left sidebar.
To add gallery widget. Click on search bar on the left sidebar widget box. Then type “Gallery” it will shows all gallery widgets. You can drag widget you want to add to the main content area on right side.
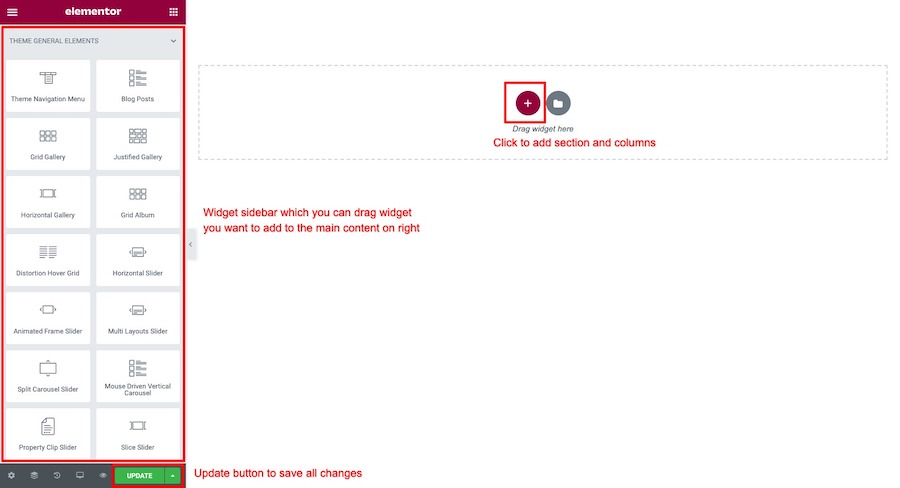
We created various gallery widgets for Elementor editor. You can select one you want to use and drag it to right side. To edit each widget option, simply click on the content and it will displays its options on the left side.
Just open WordPress edit page. You will see “Publish” box on the right side.
Click on “Edit” link then it will open password protected option there. Enter password you want to setup for this page and save changes.
How to add photo proofing gallery
When you create a page using “Elementor”. Select “Proof Gallery” widget and drag it to right side. To edit each widget option, simply click on the content and it will displays its options on the left side.
Above screenshot shows all photo proofing widget options on the left side.


 How to add photo proofing gallery