First thing to create blog content is to create a post post. Theme has various post options for you display different content on your blog post. Here are the steps to create a blog post.
Go to WordPress Dashboard > Posts > Add New
Enter post title and content. You can use any shortcode or HTML to editing field.
Assign this post to category using categories box on the right side. Add tags to this post. Type tag name in to the field in Tags box on the right side.
Upload post featured image using set featured box on the bottom right side. All pages will use this image for post preview image and thumbnail.
Once you finish, click Update.
Post Options
Post Layout – Select single post page layout between fullwidth and with right sidebar.
Featured Content Type – Select post main feature content type ex. image.
Single Post Settings
You can change single post page setting. Go to Appearance > Customize > Blog > Single Post
Display post featured content – This option will display post’s featured image or gallery at the top of single post page.
Display post tags – This option will display post’s tags at the bottom of single post page.
Display about author – This option will display post’s author information at the bottom of single post page.
Display related posts – This option will display related posts under main post content.
Post Featured Image
For each post you create you can upload featured images. Theme provides Featured Image Boxes on the bottom right side of the post editing page and this is where you upload your Featured Image.
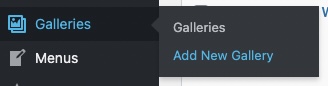
Go to WordPress Dashboard > Galleries > Add New Gallery
Enter gallery title and you can add images to this gallery. From gallery admin page. Click on “Upload Image”.
Then select images you want to upload to this gallery. Once you finish upload each image. It will automatically attach to this gallery. You can also change image caption and description by clicking image from this page. If you want to change order of images within gallery. You can easily drag&drop image next to each one. Once you finish dragging, click “Update” to save changes.
See Customer Proofing Activity Logs.
When you edit the gallery post. On the right sidebar. You will find “Gallery Proofing Log” box which you can see the proofing activity logs for this gallery.
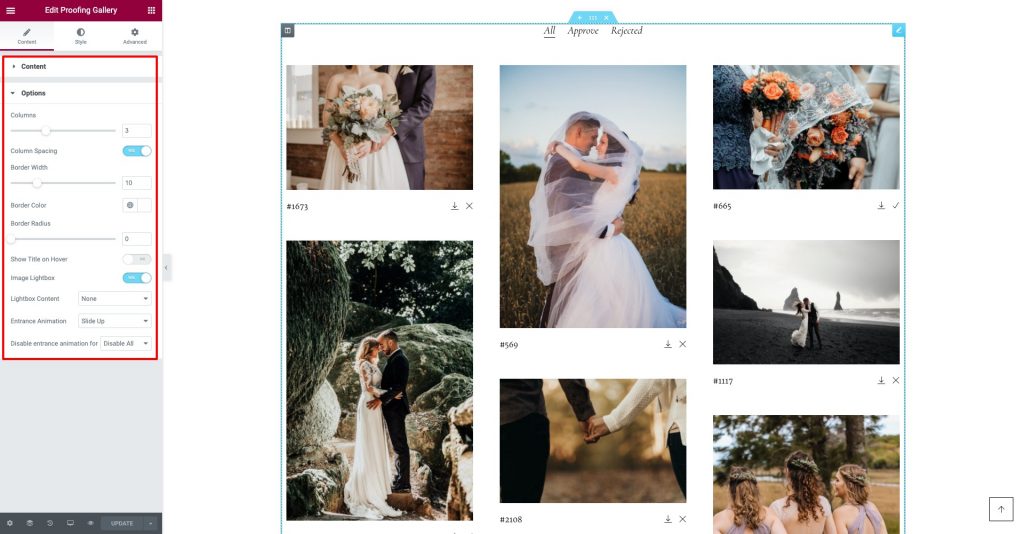
Create proofing gallery page using Elementor
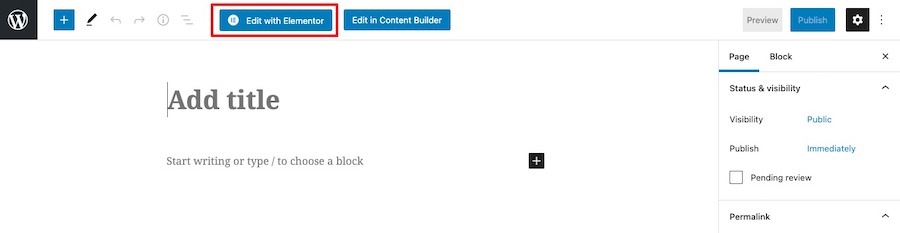
From gallery editing page. Please find “Edit with Elementor” button under gallery title. Click the button.
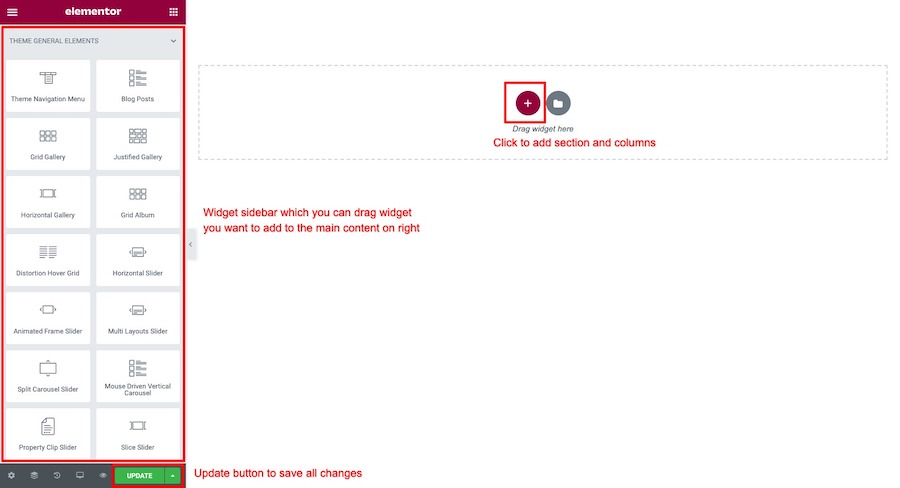
You will open a Elementor page builder. On the left sidebar. On the left sidebar search option. Search for “Proofing Gallery” widget and drag it to the right content area.
It will automatically displays the proofing gallery widget content with images within gallery. You can customise widget’s options on the left sidebar.
Go to WordPress Dashboard > Galleries > Add New Gallery
Enter gallery title and you can add images to this gallery. From gallery admin page. Click on “Upload Image”.
Then select images you want to upload to this gallery. Once you finish upload each image. It will automatically attach to this gallery. You can also change image caption and description by clicking image from this page. If you want to change order of images within gallery. You can easily drag&drop image next to each one. Once you finish dragging, click “Update” to save changes.
Customise gallery page using Elementor
From gallery editing page. Please find “Edit with Elementor” button under gallery title. Click the button.
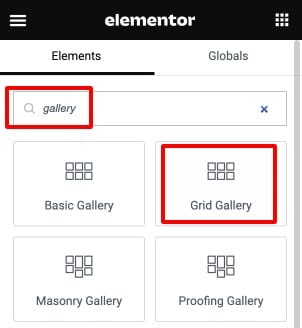
You will open a Elementor page builder. On the left sidebar. On the left sidebar search option. Search for “Gallery” widget and drag one of theme gallery widget “Grid Gallery” to the right content area.
It will automatically displays the gallery widget content with images within gallery.
Add gallery widget to a page using Elementor
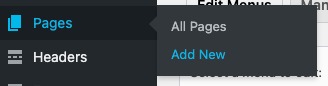
Go to WordPress Dashboard > Pages > Add New and enter page title.
Click “Edit with Elementor” button to open Elementor Page Builder.
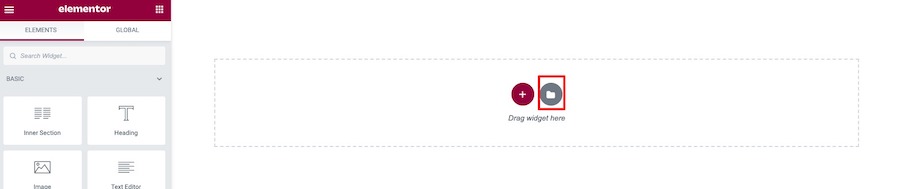
You will open a Elementor page builder. On the left sidebar.
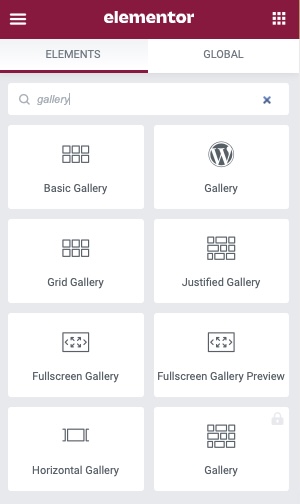
To add gallery widget. Click on search bar on the left sidebar widget box. Then type “Gallery” it will shows all gallery widgets. You can drag widget you want to add to the main content area on right side.
Go to WordPress Dashboard > Speakers > Add New Speaker
Enter speaker name and you can add speaker biography to its content using WordPress visual editor.
Then select featured images you want to upload as speaker’s portrait picture. Once you finish upload it will automatically attach to this post and click “Update” to save changes.
Speaker Options
Description (Optional) – Enter speaker description ex. job position, organisation etc.
Website(Optional) – Enter speaker website URL
Facebook URL – Enter speaker Facebook URL
Twitter URL – Enter speaker Twitter URL
Linkedin URL – Enter speaker Linkedin URL
Create a speaker page using Elementor
Go to WordPress Dashboard > Pages > Add New and enter page title.
Click “Edit with Elementor” button to open Elementor Page Builder.
You will open a Elementor page builder. On the left sidebar.
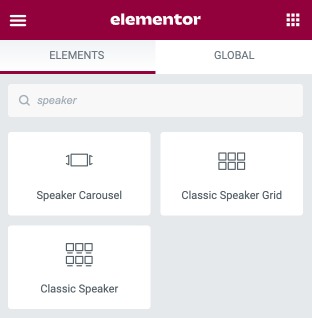
To add speaker widget. Click on search bar on the left sidebar widget box. Then type “Speaker” it will shows all speaker widgets. You can drag widget you want to add to the main content area on right side.
How to create a single speaker page using Elementor
Go to WordPress Dashboard > Galleries > Add New Gallery
Enter gallery title and you can add images to this gallery. From gallery admin page. Click on “Upload Image”.
Then select images you want to upload to this gallery. Once you finish upload each image. It will automatically attach to this gallery. You can also change image caption and description by clicking image from this page. If you want to change order of images within gallery. You can easily drag&drop image next to each one. Once you finish dragging, click “Update” to save changes.
Customise gallery page using Elementor
From gallery editing page. Please find “Edit with Elementor” button under gallery title. Click the button.
You will open a Elementor page builder. On the left sidebar. On the left sidebar search option. Search for “Gallery” widget and drag one of theme gallery widget “Grid Gallery” to the right content area.
It will automatically displays the gallery widget content with images within gallery.
Add gallery widget to a page using Elementor
Go to WordPress Dashboard > Pages > Add New and enter page title.
Click “Edit with Elementor” button to open Elementor Page Builder.
You will open a Elementor page builder. On the left sidebar.
To add gallery widget. Click on search bar on the left sidebar widget box. Then type “Gallery” it will shows all gallery widgets. You can drag widget you want to add to the main content area on right side.
First please login to your WordPress Dashboard. Go to WordPress Dashboard > Menus > Add New Portfolio
Enter portfolio title, excerpt, featured image and you can assign this portfolio item to portfolio category too.
To upload featured image. Select images you want to upload as featured image for this food menu. Once you finish upload it will automatically attach to this post and click “Update” to save changes.
Portfolio Option: Link to Custom URL
Be default, when user click on portfolio item. It will open a single portfolio page which you can customsie its content from editing portfolio content page. However you can add link single portfolio page to external URL using “Link to Custom URL”.
Organise Portfolio by Categories
If you want to categorise portfolio items by categories. You can do that easily.
Open WordPress Dashboard > Menus > Portfolio Categories. You will see list of for portfolio categories you have.
If you don’t have any, please create one first so you can assign project items to it. For example create “Wedding” sectors.
Now back to edit menu page. Look at “Portfolio Categories” box and you will see list of your current menu categories. Check one you want to assign to item to and save changes.
Customise a single porfolio page using Elementor
When you are on editing portfolio item page. Click “Edit with Elementor” button to open Elementor Page Builder.
You will open a Elementor page builder. On the left sidebar. You can drag widgets you want to add to main single portfolio contents on the right side.
Go to WordPress Dashboard > Galleries > Add New Gallery
Enter gallery title and you can add images to this gallery. From gallery admin page. Click on “Upload Image”.
Then select images you want to upload to this gallery. Once you finish upload each image. It will automatically attach to this gallery. You can also change image caption and description by clicking image from this page. If you want to change order of images within gallery. You can easily drag&drop image next to each one. Once you finish dragging, click “Update” to save changes.
Customise gallery page using Elementor
From gallery editing page. Please find “Edit with Elementor” button under gallery title. Click the button.
You will open a Elementor page builder. On the left sidebar. On the left sidebar search option. Search for “Gallery” widget and drag one of theme gallery widget “Grid Gallery” to the right content area.
It will automatically displays the gallery widget content with images within gallery.
Add gallery widget to a page using Elementor
Go to WordPress Dashboard > Pages > Add New and enter page title.
Click “Edit with Elementor” button to open Elementor Page Builder.
You will open a Elementor page builder. On the left sidebar.
To add gallery widget. Click on search bar on the left sidebar widget box. Then type “Gallery” it will shows all gallery widgets. You can drag widget you want to add to the main content area on right side.
First please login to your WordPress Dashboard. Go to WordPress Dashboard > Portfolios > Add New Portfolio
Enter portfolio title, excerpt, featured image and you can assign this portfolio item to portfolio category too.
To upload featured image. Select images you want to upload as featured image for this portfolio post. Once you finish upload it will automatically attach to this post and click “Update” to save changes.
Portfolio Option: Link to Custom URL
Be default, when user click on portfolio item. It will open a single portfolio page which you can customsie its content from editing portfolio content page. However you can add link single portfolio page to external URL using “Link to Custom URL”.
Organise Portfolio by Categories
If you want to categorise portfolio items by categories. You can do that easily.
Open WordPress Dashboard > Menus > Portfolio Categories. You will see list of for portfolio categories you have.
If you don’t have any, please create one first so you can assign project items to it. For example create “Wedding” sectors.
Now back to edit menu page. Look at “Portfolio Categories” box and you will see list of your current menu categories. Check one you want to assign to item to and save changes.
Customise a single porfolio page using Elementor
When you are on editing portfolio item page. Click “Edit with Elementor” button to open Elementor Page Builder.
You will open a Elementor page builder. On the left sidebar. You can drag widgets you want to add to main single portfolio contents on the right side.
Import Single Portfolio Template
You can import demo mega menu by clicking on template button.
It will open a popup box. Click on “Pages” tab and filter only “Single Portfolio” using search option. Then select the template you want to import by clicking “Insert” button.
Elementor will ask to connect Elementor to your website. You have to create Elementor account and connect it to your website within this process (If you have already connected to Elementor. You can skip this step).
Once it’s imported successfully. You can customize its contents using Elementor.
Go to WordPress Dashboard > Galleries > Add New Gallery
Enter gallery title and you can add images to this gallery. From gallery admin page. Click on “Upload Image”.
Then select images you want to upload to this gallery. Once you finish upload each image. It will automatically attach to this gallery. You can also change image caption and description by clicking image from this page. If you want to change order of images within gallery. You can easily drag&drop image next to each one. Once you finish dragging, click “Update” to save changes.
Create proofing gallery page using Elementor
From gallery editing page. Please find “Edit with Elementor” button under gallery title. Click the button.
You will open a Elementor page builder. On the left sidebar. On the left sidebar search option. Search for “Proofing Gallery” widget and drag it to the right content area.
It will automatically displays the proofing gallery widget content with images within gallery. You can customise widget’s options on the left sidebar.


 Elementor will ask to connect Elementor to your website. You have to create Elementor account and connect it to your website within this process (If you have already connected to Elementor. You can skip this step).