

First please navigate to Appearance > Customize > Footer > General > Display Footer Content From and select “Footer Content”
Then next step is to create a footer post using Elementor.
Create footer content posts
This option you can create multiple footer content and edit it using Elementor page builder which provides very flexible layouts for each page.
We are using Elementor Page Builder plugin so you can use its drag&drop user interface to create your footer contents.

Please navigate to WordPress Dashboard > Footers > Add New Footer. Then enter its title and click “Edit with Elementor” option.
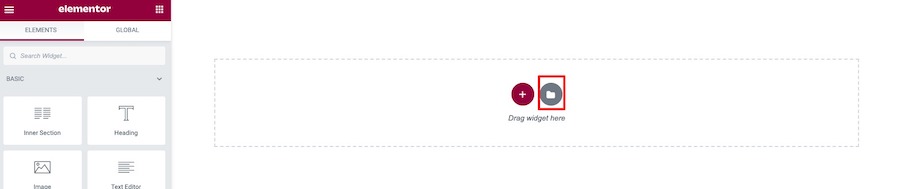
Now you will open Elementor page builder editor. You can import demo footer by clicking on template button.

It will open a popup box. Click on “Blocks” tab and filter only “Theme Footer” option. Then select footer you want to import by clicking “Insert” button.

 Elementor will ask to connect Elementor to your website. You have to create Elementor account and connect it to your website within this process (If you have already connected to Elementor. You can skip this step).
Once it’s imported successfully. You can customize footer columns, contents including social icons, buttons, logo image etc.
Setting up Footer content to pages
Once you save all changes for footer content. There are 2 options to set it up to pages. The first option is to select it globally through theme customizer and it will apply to all pages.
First you can select it as default footer content for all pages via Appearance > Customize > Footer > General > Default Footer Content.

Second you can overwrite default footer content on selected page using Page option > Page Footer.
Setting up footer using “Sidebar”
- Default way to displays footer when you activated theme.
- Easy to setup. You can organise footer contents using WordPress classic sidebar and widgets and it should be working and ready to use.
- Limited flexibility. You can choose from 4 different footer layouts.
Setting up footer post using Elementor
- Provide unlimited flexibility. You can use drag&drop functionality to create columns, elements for your footer contents.
- Customise logo images, main menu and any contents through Elementor widgets.
- You have to footer header post for footer layout and set the one you want as default WordPress customizer (Appearance > Customize > Footer)


